
I answered an interesting question in the Project Online user forum recently. The user asked how to plan for the cost of rental cars in his project. The requirements were these:
So, what do you think is the correct way to model the use of rental cars in a project? It is interesting to note that rental cars can be modeled using Work, Material, or Cost resources. However, the method for creating and assigning them to the task is different for each type of resource. In addition, some of the resource types have limitations, especially for reporting, in a Microsoft PPM environment.
To create the Rental Car resource as a Work resource, complete the following steps:
Warning: When you enter the daily rate in the Std. Rate column, be sure to include the “/day” text for the value to indicate that this is a daily rate and not an hourly rate.
Figure 1 shows how I set up the Rental Car resource as a Work resource.

Figure 1: Rental Car set up as a Work resource
To assign the Rental Car resource to a task, complete the following steps:
Microsoft Project will assign the Rental Car resource to the task. The software will calculate the cost of the rental cars for that task using the resource’s Units value, the resource’s Std. Rate value, and the Duration of the task. You can see the Units and Cost values for the Rental Car resource in Figure 2.
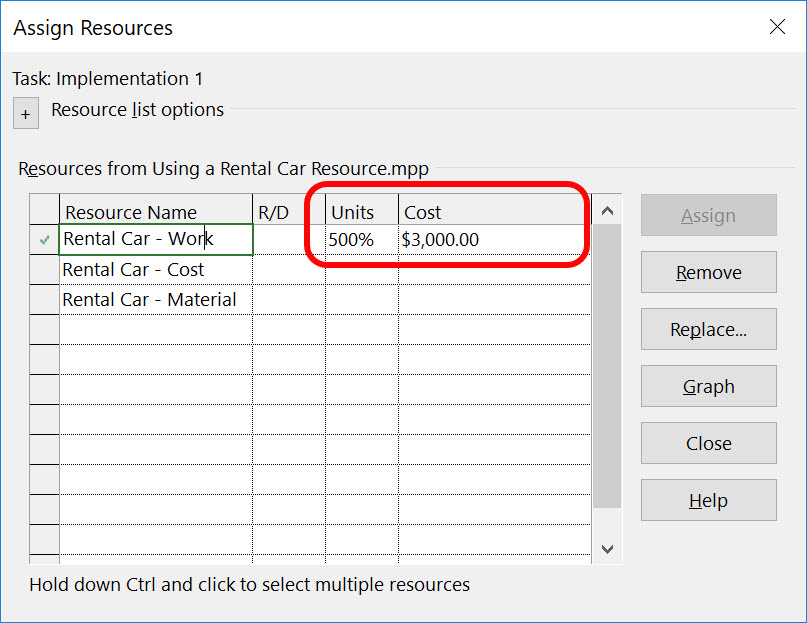
Figure 2: Assign the Rental Car resource
There are some very serious limitations when you set up the Rental Car resource as a Work resource. First of all, when you assign the Rental Car resource to a task, Microsoft Project will calculate a Work value for the assignment. In this example, the software would calculate 400 hours of Work for the Rental Car resource. Because Rental Cars do not perform work, their Work values will skew resource reporting for the project.
Another limitation is that you must enter a Max. Units value that is equal to or greater than the number of rental cars you need at any one time. In this example, I entered 500% in the Max. Units column because I knew I would need up to 5 rental cars at once. If you fail to perform this step, then Microsoft Project will display the overallocation indicator (“burning man” indicator) in the Indicators column for every task on which you assign more than one rental car resource.
A third limitation is that Microsoft Project would schedule the Rental Car resource according to the nonworking time shown on our organization’s Standard calendar, meaning that it would not schedule it on weekends and holidays. In the real world, however, you can drive a rental car 24/hours per day, 7 days per week, even on holidays and weekends. The only way to work around this limitation is to set the Base Calendar value to the 24 Hours calendar for the Rental Car resource, and then to assign the Standard calendar as a Task Calendar (override calendar) on any tasks to which the Rental Car resource is assigned.
Even though setting up the Rental Car resource as a Work resource might seem simple, I think you can see that these limitations can create multiple problems and challenges. There has to be a better way than this to set up a Rental Car resource!
To create the Rental Car resource as a Cost resource, complete the following steps:
Figure 3 shows how I set up the Rental Car resource as a Cost resource.

Figure 3: Rental Car set up as a Cost Resource
To assign the Rental Car resource to a task, complete the following steps:
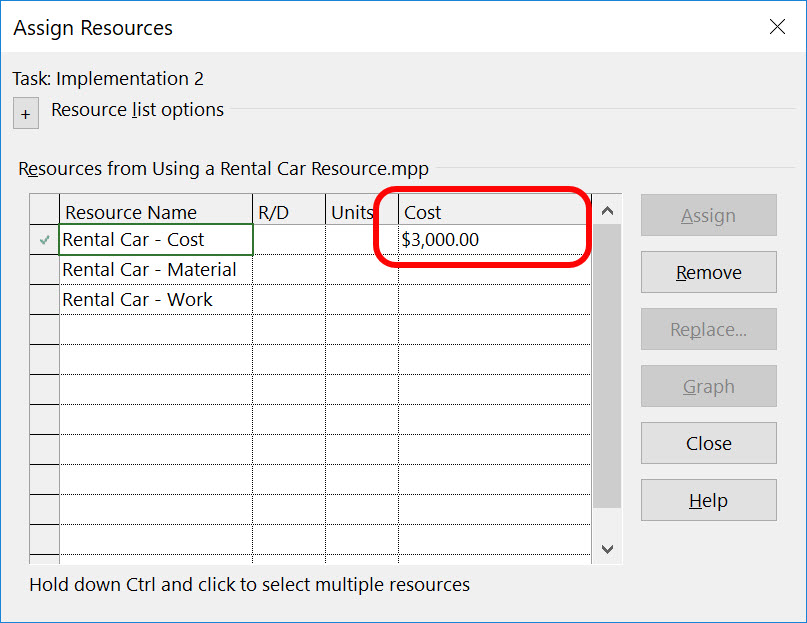
Figure 4: Cost value manually entered
The biggest limitation of using the Rental Car as a Cost resource is that you must manually calculate and then enter the cost of the rental car resources on each task individually. Because the Cost value you enter is static, Microsoft Project will not recalculate the Cost value of the Duration of the task changes. The advantage of using the Material type for the Rental Car resource is that it would be possible to report on rental car expenditures across all projects in your organization if you are using either Project Online or Project Server as a PPM solution.
The third way to set up a Rental Car resource would be as a Material resource. To create the Rental Car resource as a Material resource, complete the following steps:
Figure 5 shows how I set up the Rental Car resource as a Material resource.

Figure 5: Rental Car set up as a Material resource
To assign the Rental Car resource to a task, complete the following steps:
Microsoft Project will assign the Rental Car resource to the task. Using the Units value you entered, the Std. Rate value for the resource, and the Duration of the task, the software will calculate the cost of the rental cars for that task. You can see the Units and Cost values for the Rental Car resource in Figure 6.
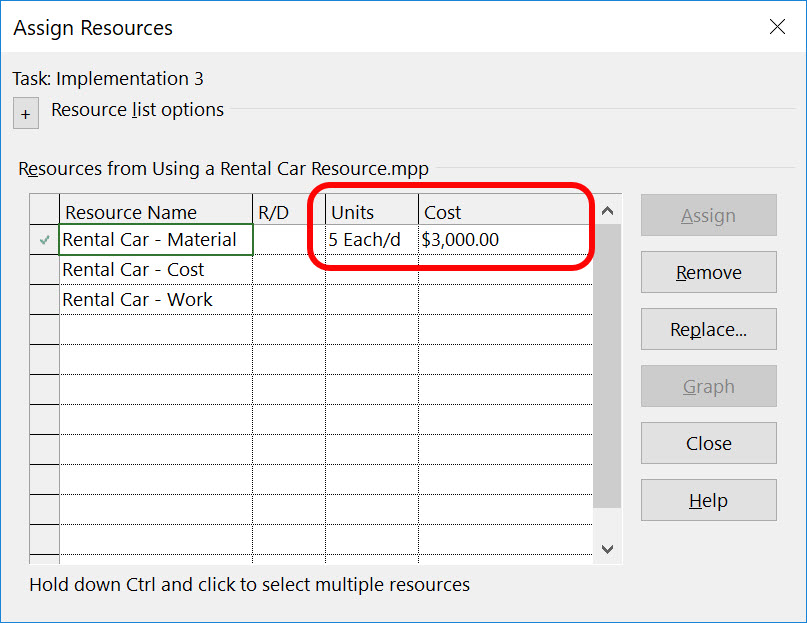
Figure 6: Assign the Rental Car resource
There are multiple advantages in treating a Rental Car resource as a Material resource. First, Material resources generate cost, but they do not generate any work. This overcomes the biggest problem with using a Work resource for rental cars. Second, there is no need to specify a Max. Units value for the resource, as Microsoft Project assumes you have an unlimited supply of rental cars. Lastly, Material resources can be scheduled 24 hours/day, 7 days/week, even during holidays.
Given that the Material resource has only advantages and no disadvantages, this is the method I would recommend you use if you need to track the costs of rental cars in your own projects.
")
