
A powerful new feature in Microsoft Project 2016 allows project managers to display multiple timelines in a single Timeline view. For example, notice in the following figure that my Timeline view displays three different timelines with different sets of tasks in the same Timeline view.
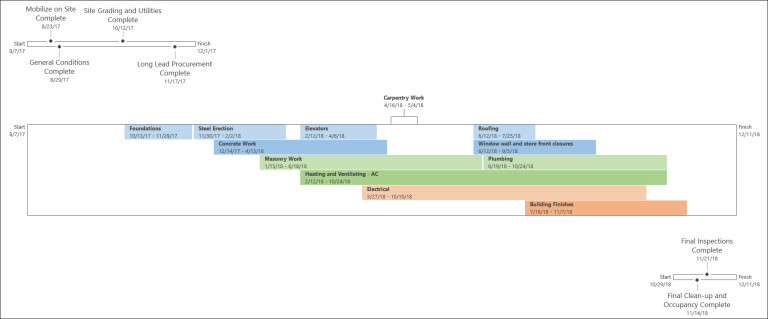
Figure 1: Multiple timelines in the Timeline view
Related: VIDEO: Project Management in Office 365 and Microsoft Teams
However, what if you are using the 2010 or 2013 version of Microsoft Project? How can you display multiple timelines using the Timeline view? The answer is that you must create multiple Timeline views, each of which contains a timeline with the tasks you want to display.
I suspect that many project managers do not realize that you can create multiple Timeline views in Microsoft Project 2010, 2013, or even in the 2016 version. In fact, just this past week, I answered a question about this in the Office Answers – Microsoft Project user forum. The user wanted to know how to display different sets of tasks in the Timeline view in Microsoft Project 2013. I told the user that he/she would need to create multiple Timeline views for this purpose.
If you need to create multiple Timeline views to display different sets of tasks in your own projects, complete the following steps:
1. Open a project that needs multiple Timeline views.
2. Click any View pick list menu (such as the Gantt Chart pick list menu on the Task ribbon) and select the More Views item.
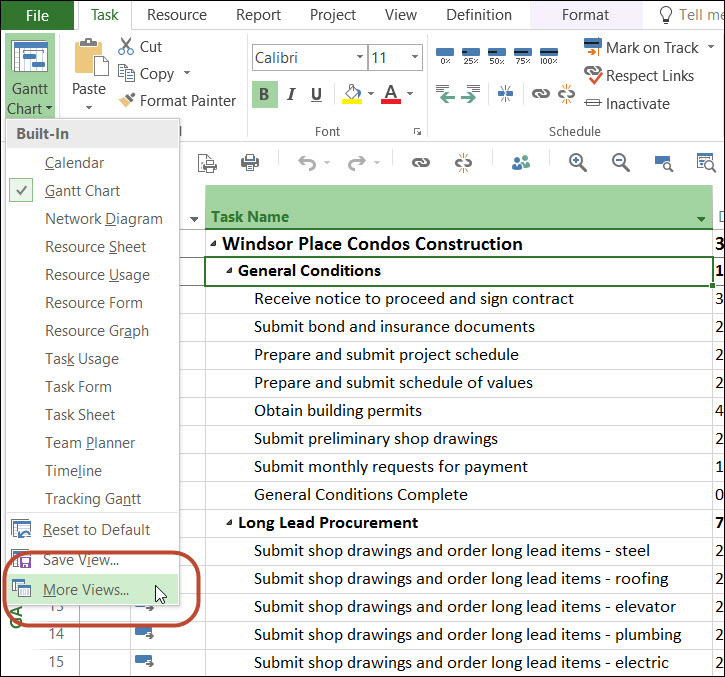
Figure 2: Select the More Views menu item
3. In the More Views dialog, click the New button.
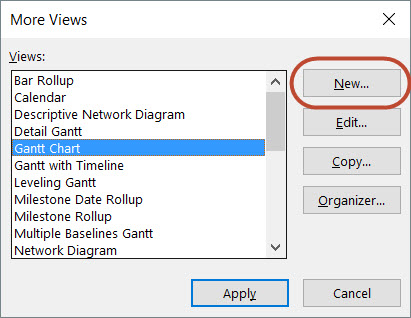
Figure 3: Click the New button
4. In the Define New View dialog, select the Single View option and click the OK button.
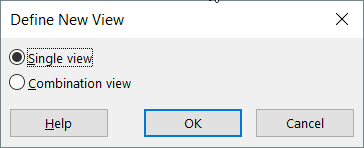
Figure 4: Select the Single View option
5. In the View Definition dialog, enter a name for the new view in the Name field.
6. Click the Screen pick list and select the Timeline item.
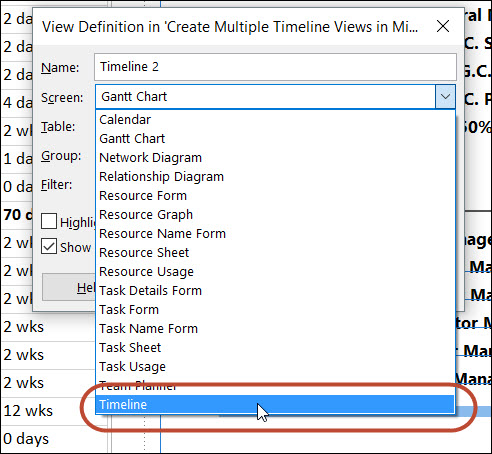
Figure 5: Create a new Timeline view
7. Click the OK button to close the View Definition dialog.
8. Click the Close button to close the More Views dialog as well.
After creating the new Timeline view, you must apply it by completing the following steps:
- Apply the Gantt Chart view, if it is not already applied.
- Click the View tab to display the View ribbon.
- In the Split View section of the ribbon, select the Timeline checkbox.
- Click the Timeline pick list to the right of the checkbox and select your new Timeline view.
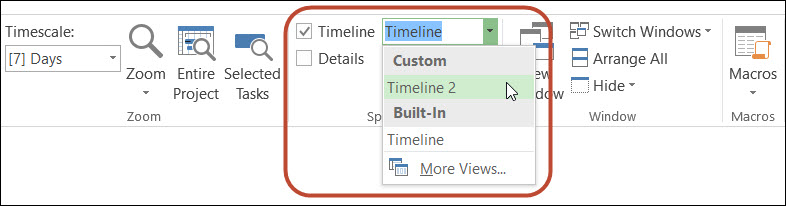
Figure 6: View ribbon – Apply the new Timeline view
The new Timeline view will be blank, and ready for you to add tasks to the timeline. Using this technique, you can use as many Timeline views as you need.

")
