Related: VIDEO: Project Management in Office 365 and Microsoft Teams
A question asked occasionally in the Microsoft Project and Project Online user forms is this: “How can I link a task in one project with a task in another project?” The heart of this question is that the project manager needs to know how to create cross-project dependencies. This question is relevant to almost all Microsoft Project users, regardless of whether you are managing standalone projects using only the Microsoft Project desktop client, or whether you are using Microsoft Project with a PPM tool, such as Project Server or Project Online.
In fact, I recently answered this exact question for a user in the Project Server forum for administrators. Because the answer to this question requires a “trick,” I thought I would share the answer with you so that you can apply this knowledge in your own project management environment.
Following are the steps you should follow to create cross-project links between two or more projects:
1. In Microsoft Project, open each of the projects that you want to link. If you are using Microsoft Project Server or Project Online, you must open each of your enterprise projects and check them out for editing in Microsoft Project (you cannot perform this operation in PWA). If you are using the Microsoft Project desktop application only, simply open each of your MPP files in Microsoft Project.
2. Click the View tab to display the View ribbon shown in Figure 1.
 Figure 1: View ribbon – New Window button
3. In the Window section of the View ribbon, click the New Window
4. In the New Window dialog shown in Figure 2, select each of the open projects, then click the View pick list and select the Gantt Chart
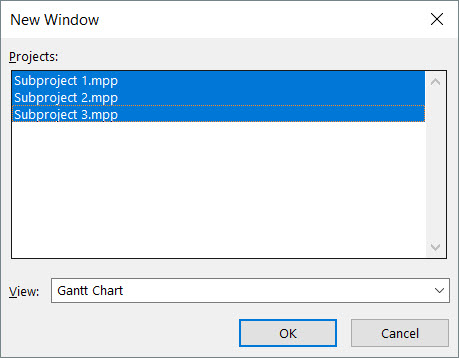
Figure 2: New Window dialog
5. In the New Window dialog, click the OK This will create a temporary master project with each of the selected projects inserted as subprojects. Notice in Figure 3 that Microsoft Project automatically expands tasks in each of the subprojects in the temporary master project.

Figure 3: Temporary master project
6. In the temporary master project, select a Predecessor task in one project, press and hold the Control key, and then select a Successor task in another project.
7. In the Schedule section of the Task ribbon, click the Link the Selected Tasks button to link the tasks. This will create a cross-project dependency (aka “cross-project link”) between the two projects.
8. Repeat steps #6-7 until you have created all the required cross-project links. For example, notice in Figure 4 that I linked the Design Module A, Design Module B, and Design Module C tasks across three projects.
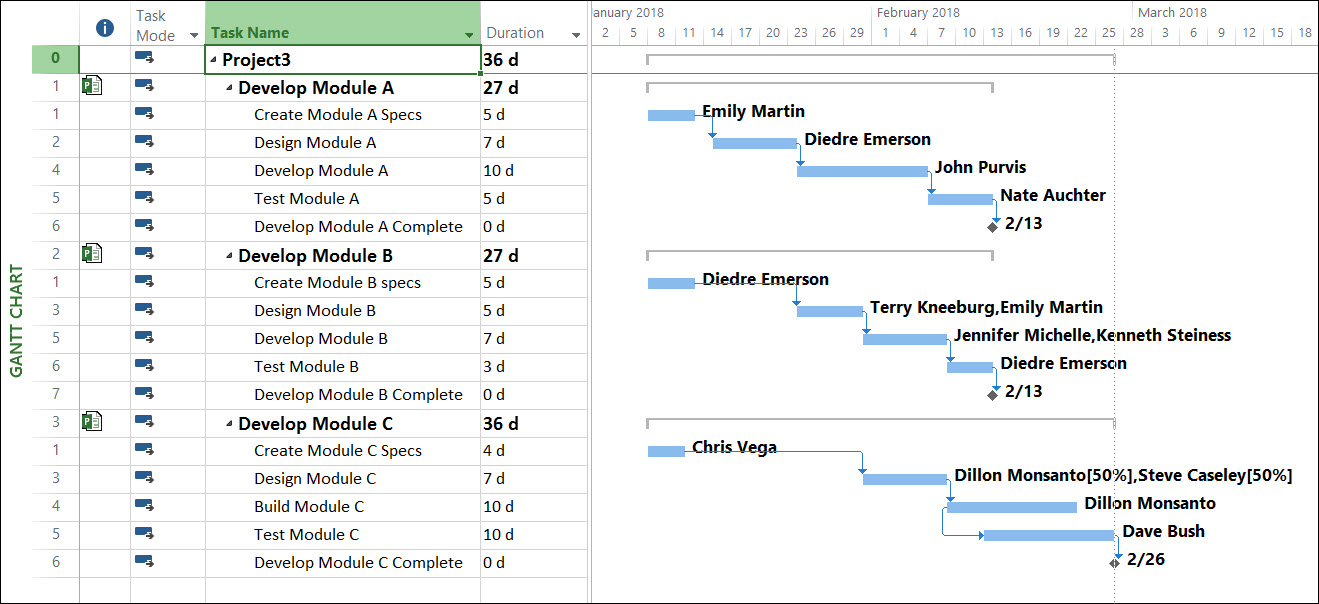
Figure 4: Cross-project links set
Warning: As of the date this is written, because of an unfixed bug in the Microsoft Project 2016 desktop application, the software does not display the link lines for the cross-project dependencies you set.
9. Click File > Close to close the temporary master project. When prompted in a warning dialog to save the changes, click the No button, as shown in Figure 5.
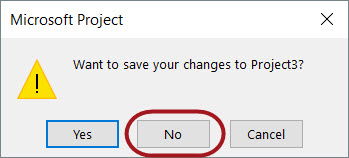
Figure 5: Warning dialog to save changes to the master project
Your open projects will now contain the cross-project dependencies that you set in the temporary master project. Microsoft Project will format the external Predecessors and external Predecessors as “ghost tasks” using gray text and gray Gantt bars, such as for the two external tasks shown in Figure 6.
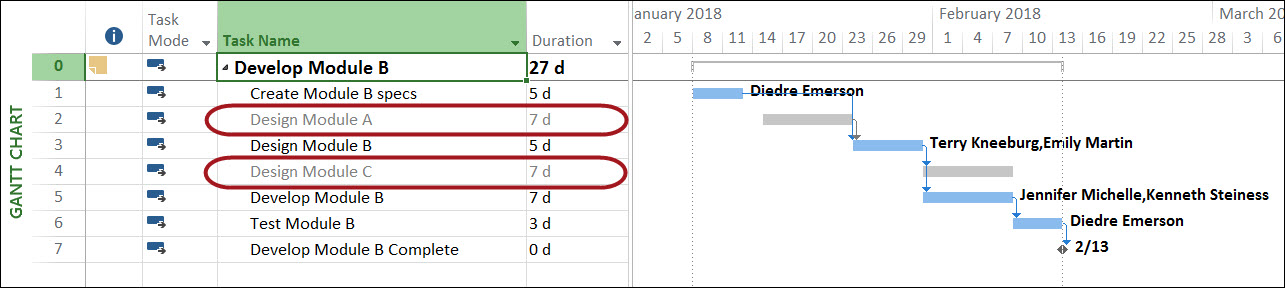
Figure 6: External tasks set
Remember that the external task dependencies are not stored in the master project; they are stored in the individual subprojects. This is why the master project is temporary, meaning that you do not need to save the changes when you close it. All you need to do at this point is to save and close each of your open projects to maintain the cross-project dependencies you set.
PMI is a registered mark of the Project Management Institute, Inc.
